
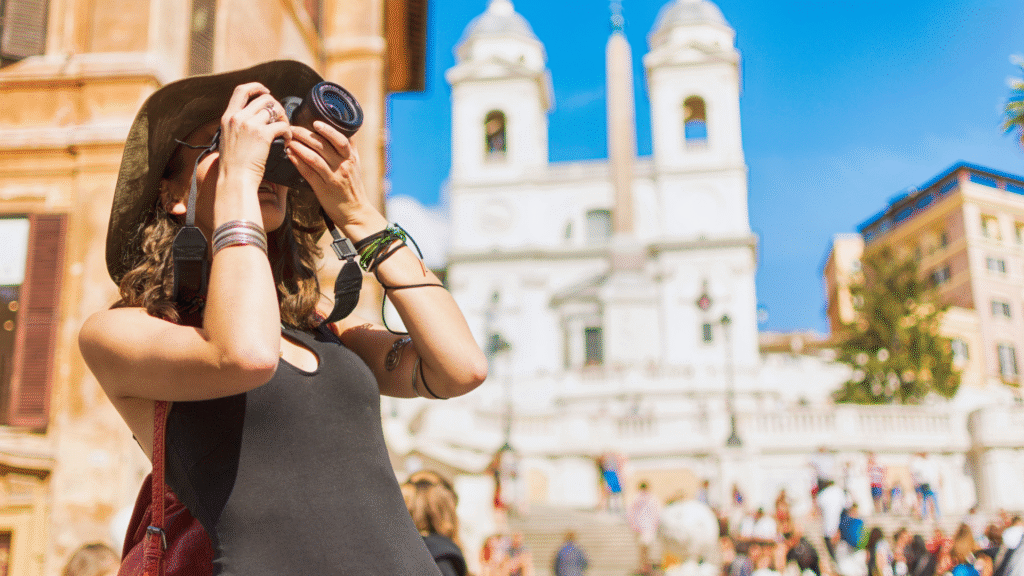
Natural light plays a crucial role in enhancing travel photography. By understanding how to harness natural light effectively, photographers can significantly elevate the quality of their images. Depending on the time of day and weather conditions, light can create dramatic effects, highlight colors, and add texture to photographs.
Many travelers may overlook the importance of lighting when capturing scenes. The golden hour, just after sunrise and before sunset, offers soft, warm tones that are ideal for creating inviting images. This natural illumination can transform ordinary pictures into memorable visual stories that resonate with viewers.
Using natural light also encourages photographers to explore different perspectives and compositions. Shadows, reflections, and varying intensities of light can serve as tools for creativity, helping to tell a unique story about each destination. Embracing natural lighting will improve not only the technical aspects of photography but also the emotional impact of the images captured during travels.
Mastering Natural Light for Travel Photography
Natural light is a powerful element in travel photography, influencing the mood and clarity of images. Understanding its qualities, adapting to various conditions, and effectively using its direction are essential practices that every photographer should master.
Understanding Natural Light and Its Qualities
Natural light varies significantly throughout the day, impacting how subjects appear in photographs. The quality of light can be categorized as soft or hard.
- Soft Light: Occurs during overcast days or early mornings and late afternoons. This type of light minimizes shadows, creating a gentle and flattering look.
- Hard Light: Typically found during midday when the sun is directly overhead. This results in stronger shadows and can produce high contrast, making it challenging for certain subjects.
Understanding ambient light’s temperature is also crucial. The color of light shifts from warm hues at sunrise and sunset to cooler tones at noon. Awareness of these qualities allows photographers to make informed decisions on when and where to shoot.
Adapting to Different Light Conditions
Travel photographers often face varying light conditions, from bright sun to gloomy skies. Successful adaptation requires quick thinking and technique adjustments.
In bright sunlight, using techniques such as:
- Reflectors: To bounce light onto subjects and soften shadows.
- Diffusers: To scatter light and reduce its intensity.
On cloudy days, photographers can take advantage of even lighting, which reduces harsh shadows and highlights details in subjects.
For night photography, relying on available light sources like street lamps or neon signs can create captivating images. Adjusting camera settings like ISO, shutter speed, and aperture helps maximize the available light.
Reading and Using Direction of Light
The direction of light plays a critical role in shaping images. Photographers need to consider where the light originates to enhance their compositions.
Front lighting illuminates subjects directly, revealing details but may lack depth. Side lighting, on the other hand, adds texture and dimension to subjects by creating shadows. This technique enhances the three-dimensional quality of images, making them more engaging.
Backlighting can produce dramatic silhouettes, particularly during sunsets. Properly utilizing light direction can result in stunning visual narratives, making each photograph compelling.
By mastering these elements of natural light, photographers can elevate their travel images and capture unique moments effectively.
Techniques for Creative Use of Light
Natural light offers countless opportunities for enhancing travel photography. By using specific techniques, photographers can achieve unique effects and capture stunning images.
Using Golden Hour and Blue Hour
Golden hour refers to the time just after sunrise and before sunset when the light is soft and warm. This light creates long shadows and enhances textures. Photographers should look for interesting compositions, such as landscapes or portraits, during this time.
Blue hour occurs shortly before sunrise and after sunset, characterized by cooler tones. This period is ideal for capturing cityscapes with vibrant skies. Combining the two can result in images rich in color and depth. He or she can experiment by varying the exposure to emphasize different aspects of the scene.
Maximizing Soft and Diffused Light
Soft and diffused light is often found on overcast days or when sunlight filters through trees. This type of light reduces harsh shadows and flattens highlights, making it perfect for close-up shots of subjects like flowers or intricate architectural details.
To maximize this effect, a photographer can position subjects under shade or use a reflector to redirect light. The result is a more even exposure across the subject, offering delicate and nuanced images. This technique works well in portraits, helping to flatter skin tones while minimizing flaws.
Harnessing Shadows, Contrast, and Silhouettes
Shadows can add depth, texture, and interest to photographs. A skilled photographer utilizes shadows to create dramatic effects and enhance contrast. This technique can highlight specific elements within a frame, drawing attention to the subject while providing context.
Silhouettes are particularly striking when shot against vibrant backgrounds, such as sunsets. To create a silhouette, a photographer should expose the background light rather than the subject. This approach delivers a compelling image, using shapes and forms rather than details.
Composing with Backlighting and Sidelight
Backlighting involves placing the light source behind the subject. This technique creates a luminous effect that can enhance the visibility of finer details, such as hair or textures in fabrics. It often produces a halo effect, adding an ethereal quality to images.
Sidelight, or side lighting, occurs when daylight hits the subject from the side, emphasizing texture and form. This can create powerful contrasts, highlighting patterns or contours on various surfaces. By adjusting the position relative to the light source, photographers can explore fascinating compositions that capture an object’s three-dimensionality.
Optimizing Your Camera Settings and Equipment
For effective travel photography in natural light, understanding camera settings and utilizing appropriate equipment is essential. Carefully adjusting exposure, ISO, and aperture will enhance image quality. Additionally, using the right shutter speed and equipment like reflectors can significantly improve results in varying lighting conditions.
Exposure, ISO, and Aperture for Natural Light
In natural light photography, exposure is crucial. It determines how much light reaches the camera sensor. A well-exposed photograph captures details in both highlights and shadows.
- ISO: Start with a low ISO (100-400) in bright conditions to reduce noise. Increase it in dim light, but be cautious of noise at higher settings.
- Aperture: A wider aperture (lower f-number) allows more light, ideal for portraits, while a narrower aperture (higher f-number) enhances the depth of the field for landscapes.
Finding the right combination of these settings allows for optimal control over light and depth in images.
Selecting the Right Shutter Speed
Shutter speed affects how motion is captured in photography. A fast shutter speed (1/500s or faster) freezes motion, useful for action shots. In contrast, a slower shutter speed (1/30s to 1/60s) creates blur and conveys movement.
When shooting in direct sunlight, a faster setting helps avoid overexposure. Conversely, during overcast days, a slower speed may be necessary due to lower light levels. Always adjust according to the subject’s movement and desired outcome.
Using Reflectors, Tripods, and Natural Reflectors
Using reflectors can greatly enhance lighting in portraiture and nature shots. These tools bounce natural light back onto the subject, softening shadows and providing even illumination.
- Tripods: For low light conditions, a tripod stabilizes the camera, allowing for longer exposure without blur. This is particularly useful in challenging environments.
- Natural Reflectors: Surfaces such as water, sand, or light-colored walls can act as natural reflectors. They bounce light onto the subject from different angles, adding depth and dimension.
Incorporating these elements allows for more creative control and improved image quality.
Enhancing Image Quality in Low and Harsh Light
Low light conditions often challenge photographers, but adjusting settings can lead to stunning results. Increase ISO cautiously and use a larger aperture to capture available light.
In harsh light, such as the midday sun, harsh shadows can detract from image quality. Utilizing reflectors or shooting during golden hour can soften the light. Overcast days provide even lighting, ideal for capturing details without harsh contrasts.
In any light, focusing on optimal settings and equipment will significantly enhance the overall quality and appeal of travel photographs.
Light Concepts for Different Photography Genres
Light plays a crucial role in various photography genres, impacting not only the mood but also the story conveyed through images. Understanding how to utilize natural light can significantly enhance the quality and appeal of photographs.
Landscape Photography: Capturing Depth and Texture
In landscape photography, natural light is essential for showcasing depth and dimension. The golden hour, shortly after sunrise or before sunset, provides soft, warm light that accentuates textures in the scenery.
By positioning the camera to utilize side lighting, photographers can highlight the contours of mountains, valleys, and other features. Incorporating foreground elements can enhance the depth of the field, leading the viewer’s eye through the composition.
Utilizing backlighting can create dramatic silhouettes or illuminate textures in foliage and water. Each approach significantly enhances the visual narrative, making landscapes appear more dynamic and engaging.
Street and Portrait Photography: Light for Storytelling
Street photography relies heavily on natural light to capture candid moments and create compelling visual narratives. Natural light aids in conveying emotions and providing context in varied urban settings.
For portrait photography, understanding different lighting conditions is key to achieving flattering results. Front light illuminates facial features evenly, while diffused light, such as that from overcast skies, softens shadows and reduces harsh contrast.
Experimentation with shadow and light direction can help enhance the story behind the subject, adding depth and interest. Photographers often capture subjects amidst architectural elements that manipulate light, enriching the narrative aspect.
Utilizing Color Temperature and Window Light
Color temperature significantly impacts the mood of photographs. Warmer tones often evoke feelings of warmth and comfort, while cooler tones suggest calmness or detachment. Photographers can adjust settings to enhance these effects or manipulate color with the time of day.
Using window light can create stunning portraits with soft, natural illumination. The angle of the light determines the quality of texture and shadow on the subject’s face.
Placing the subject near a window benefits from diffused light that flatters skin tones and creates a three-dimensional effect. Photographers should be mindful of the light’s color temperature, as it influences not only mood but the overall aesthetic of the image.